A liner that fits the cap can still fail if its sealant does not bond to the container neck, its diameter misses part of the sealing land, or the process overheats the package. By matching materials, dimensions, closure design and operating conditions, you can choose a liner that survives production and verify the seal before release.
Key takeaways
- Match the heat-seal layer to the container surface, not the cap material.
- Confirm liner diameter, neck finish, cap fit, and compression before testing.
- Set power and dwell time through controlled trials, not guesswork.
- Prove seal integrity with leak, burst, torque, and visual checks.
How do you match the liner to the container, cap and product?
Match the heat-seal layer to the container surface touching the liner, not simply to the cap. Confirm whether that surface is PP, HDPE, PET, glass, metal, or a coating on a multilayer container.
A PE-compatible liner can seal HDPE yet form a weak seal on PET or glass; use a glass-compatible sealant where glass is the contact surface.
| Container surface | Sealant decision | Failure if mismatched |
|---|---|---|
| PP or HDPE | Use a compatible polyolefin sealant | Heat or torque can deform the neck |
| PET | Use a PET-compatible sealant and control heat | Adhesion loss or neck distortion |
| Glass | Use a glass-compatible sealant | Dust or poor adhesion can create leaks |
| Coated or multilayer | Match the actual coating | Substrate compatibility alone proves nothing |
Record the cap material separately because it affects induction heating, compression and thermal exposure. It does not select the sealant by itself. Test the complete filled system with the actual cap, container and liner.
Ask for chemical-resistance and migration evidence for the finished liner construction. Check exposure to oils, solvents, alcohol-containing liquids, acidic foods, fragrances, powders and pharmaceutical formulations, including intended contact time, temperature and product concentration. Adhesives, coatings, inks, backing layers and sealants can all be attacked.
Include hot-fill, pasteurization, sterilization, freezing and refrigerated storage when applicable. A room-temperature test does not qualify retort or hot-fill service. For food and pharmaceutical packs, review requirements for every layer, not only the foil alloy or bottle resin.
How do you confirm that the liner fits the neck finish and cap?
Before ordering production quantities, measure the cap inner diameter, liner outer diameter, liner thickness, neck finish dimensions, sealing land width and cap depth. The liner must cover the complete sealing land without entering the bore, dropping below the land or fouling the thread.
Check the geometry that nominal diameters hide:
- Inspect neck ovality, interrupted sealing lands, tamper-band geometry and molding flash. Each can create a local nonseal even when the average dimensions match.
- Place the liner in the cap and inspect it from above and below. It must sit flat, remain centered and avoid buckling when the cap is applied.
- Compare liner thickness with available cap depth. The closure needs enough room to generate compression without distorting the liner, neck or finish.
| Construction | Opening result | Choose it when |
|---|---|---|
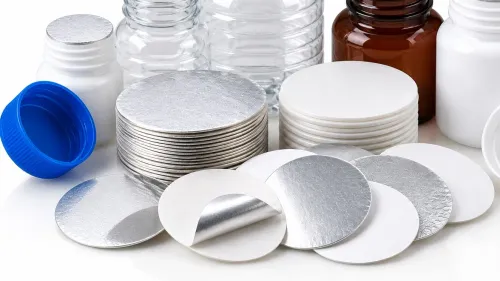
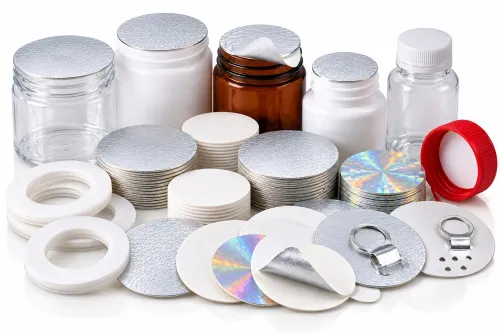
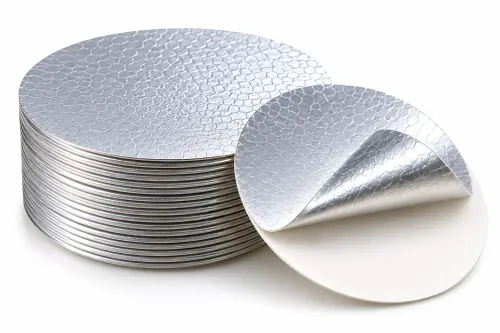
| Two-piece induction liner | The foil seals to the container while the backing remains associated with the cap | You need cap-associated backing after opening and want guided consumer handling |
| Single-piece induction liner | One membrane remains on the container or cap-side retention is avoided | You want a simple opened pack and do not want a liner retained in the cap |
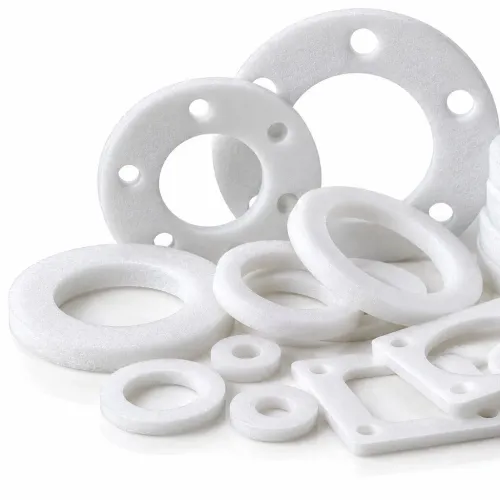
This choice changes opening force, reclosure behavior, consumer handling and the appearance of the opened pack. Do not substitute an EPE pressure-sensitive, friction-fit or ring liner for an induction liner: those constructions seal through pressure, friction or compression and are not automatically compatible with induction equipment.
How should you set induction conditions for the selected liner?
Set induction conditions as a matched closure-and-line process, not by choosing a wattage. Use a numbered trial record:
1. Set cap torque high enough to compress the liner across the entire sealing land. Establish torque separately for each cap, neck finish, liner thickness and filling line; excessive torque can deform a thin neck, distort the liner or damage the finish.
2. Record induction frequency, power, conveyor speed, dwell time, head height and container spacing together. Power alone is not a usable specification because conveyor speed changes the energy delivered beneath the induction head.
3. Center the induction head over the cap and control its height. Off-center positioning causes asymmetric heating, while excessive distance can leave the perimeter undersealed.
4. Keep the sealing land free of oil, syrup, surfactant, powder, foam and condensation. Control fill level so product does not wet the neck during capping; contamination creates channels, weak adhesion and local overheating.
5. Choose a non-vented hermetic liner when the pack must retain liquid or volatile contents, protect against oxygen, or meet validated leakage requirements. Choose a vented construction only when the product generates gas or pressure during storage, fermentation or reaction.
Orient the membrane as specified: venting can equalize pressure, but it does not provide the same leak, oxygen or moisture barrier as a hermetic seal.
How do you prove the seal works and diagnose failures?
Run filled containers through the actual capping and induction conditions, then inspect each seal after the specified cooling time. Look for wrinkles, lifted edges, incomplete circumferential seals, burn marks, cap distortion and liner movement.
Use peel testing to compare adhesion and opening behavior, but define seal width, peel angle, speed, conditioning period and sampling location. Peel force alone does not prove hermeticity; a strong-looking peel can hide channels or intermittent unsealed areas.
| Method | Answers | Important limit |
|---|---|---|
| Bubble emission | Finds gross leaks under pressure | ASTM F2096; set your own acceptance limit |
| Dye penetration | Reveals dye paths through seal defects | ASTM F1929; not a universal bottle-and-cap limit |
| Vacuum or pressure-decay | Measures package leakage under a controlled condition | Choose settings for the package geometry |
Add leak testing suited to the package, then open finished packs to confirm the membrane, backing and closure provide the intended tamper evidence.
- No adhesion: verify sealant compatibility, head height, power-speed balance, torque and neck cleanliness.
- Partial seal: check centering, narrow or interrupted sealing land, ovality and contamination.
- Burn-through, melted threads or warped containers: reduce excessive heat, dwell, torque or head proximity.
- Leaks after cooling: investigate channels, shrinkage and insufficient compression.
- Liner sticking to the cap or container: review the construction and release surface.
Store liners sealed against humidity, heat, dust, compression and deformation before insertion.
What should you specify and test before approving a liner for production?
Approve a liner only after a signed trial record shows acceptable seal integrity across the intended production range, not merely after a supplier datasheet review.
1. Ask for the liner diameter and thickness, sealant type, backing material, vent type, container-resin compatibility, operating window, recommended cap torque, and test reports and certificates relevant to the finished construction.
2. Request samples for every bottle, jar and cap format. Check cap inner diameter, neck size, sealing-land width, cap depth, foil diameter and head clearance; confirm that the liner sits flat, remains centred and does not buckle or foul the thread.
3. Record line trials using the actual product, fill level, capper, induction head, line speed and cooling period. Record power with speed, because conveyor speed, head height, spacing, foil construction and cap material change delivered energy.
4. Test each combination with destructive seal tests, leak testing, visual inspection and opening trials. Inspect for incomplete seals, wrinkles, burn marks, cap distortion, liner movement and unacceptable opening force.
5. Set changeover time when one liner cannot cover different neck diameters, land widths, cap materials or line speeds. A claim that one machine seals all containers does not remove these limits; geometry, foil diameter, cap material, head clearance and throughput can still make the setup unsuitable.
6. Reject induction sealing when the pack needs a resealable closure, lacks a continuous sealing land, uses an incompatible contact material or requires pressure relief that the selected ordinary liner cannot provide. Surya Products Limited is useful when its samples and setup support are tested against these specifications rather than treated as universally interchangeable.
Related products
 | INDUCTION SEALING WADS Paperboard, polyethylene and wax made two piece induction wads are reliable options for effective sealing of bottles and containers. View product → |
 | Single Piece Induction Wads Keeping track with the latest market developments, we are engaged in offering an extensive range of Induction Sealing Wads. View product → |
Frequently asked questions
How do you match an induction liner to the container and product?
Identify the container surface touching the liner—PP, HDPE, PET, glass, metal, or a coating—then choose a compatible heat-seal layer. Check product compatibility, temperature exposure, chemical resistance, and required barrier performance.
How do you confirm that an induction liner fits the neck finish and cap?
Check the liner diameter against the neck finish, confirm it sits flat without buckling, and verify that the cap holds it evenly during application. Inspect the liner after capping for wrinkles, edge lift, or contact outside the sealing land.
How should you set induction conditions for the selected liner?
Run controlled trials that vary induction power, conveyor speed or dwell time, and head height while holding cap torque and liner position constant. Select settings that produce a continuous seal without scorching, melting, distortion, or incomplete bonding.
How do you prove the seal works and diagnose failures?
Use visual inspection alongside leak, vacuum, pressure, burst, peel, or torque testing suited to the package. Map failures to symptoms such as missing seal areas, wrinkles, burnt liners, cap damage, contamination, poor fit, or insufficient heat.
What should you specify and test before approving a liner for production?
Specify the container material and neck finish, liner construction, diameter, thickness, cap type, product, filling conditions, induction equipment, and acceptance limits. Test production samples across the operating range, including seal integrity, opening performance, storage exposure, and transport handling.
Related products
 | Sealing Wads Two peice tye Induction wads View product → |
 | EPE Ring Liners EPE Ring Wad For Fridge Bottle Cap An EPE ring liner is a type of liner made from expanded polyethylene foam that is commonly used in fridge bottle caps to provide a seal between the... View product → |
 | EPE LINERS WADS These are EPE LINERS & WADS used in Metal & Plastic Caps for Air tight , Leakage control And Moisture control from Bottles. View product → |
 | Vented Sealing Wads This is a special type of induction wads with Vent or Air membrane provided for passing of Gases and hot air through membrane. View product → |